Please follow the instructions below if you receive any of the following alarms/alerts:
-
WARP AC power failure
-
WARP standby battery low
-
Monitoring alarm
If the WARP is offline for an extended period, it may take up to 48 hours for all data to be visible on the CAM+ Website after it is back online. Please contact us if you need the data urgently.
Your account may be configured to trigger an alarm to inform you that a monitoring alarm has been resolved. If so, the alarm will state ‘Monitoring Restored’.
-
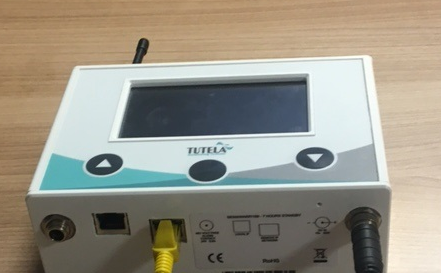
Locate the WARP on site.
-
Check that the power cable is securely connected to the bottom of the WARP and the power outlet on the wall, and ensure the power outlet switch is turned on (if applicable).
-
Check the icons on the top of the WARP display panel. If you see
-
The WARP is running on AC power (see image 2). Continue with step 4
-
The WARP is running on battery power (see image 3) or the WARP is powered off (i.e. the screen is blank, see image 4):
-
Remove the power and Ethernet cable from the bottom of the WARP.
-
Press the pin switch (see image 5) by gently inserting a fine pointed object, such as a paperclip, until you hear the button click.
-
Wait 30 seconds.
-
Reconnect the power cable. If:
-
The WARP is now running on AC power. Reconnect the Ethernet cable to the WARP and continue with step 4
-
The WARP is still running on battery power/still powered off. Please contact us
-
-
-
-
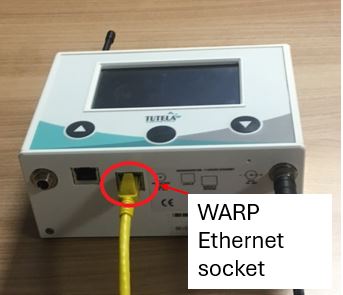
Check that the Ethernet cable is securely connected to the right-hand Ethernet socket on the bottom of the WARP (see image 6) and the Ethernet outlet on the wall.
-
Check the icons on the top of the WARP display panel. If you see:
-
There is remote Ethernet connection (see image 7). You have resolved the issue
-
There is no remote Ethernet connection (see image 8). Continue to step 6
-
-
Contact your company’s IT support team and ask them to check if any recent internal infrastructure changes may have affected WARP connectivity. When making the request, please:
-
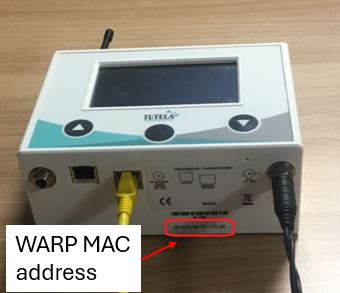
Include the MAC address on the bottom of the WARP (see image 9)
-
Specify the Ethernet outlet that the WARP connects to
-
If your IT department requires assistance or additional information, please ask them to contact us.