Overview
Custom Roles allow you to restrict specific checks or entire checklists to selected users.
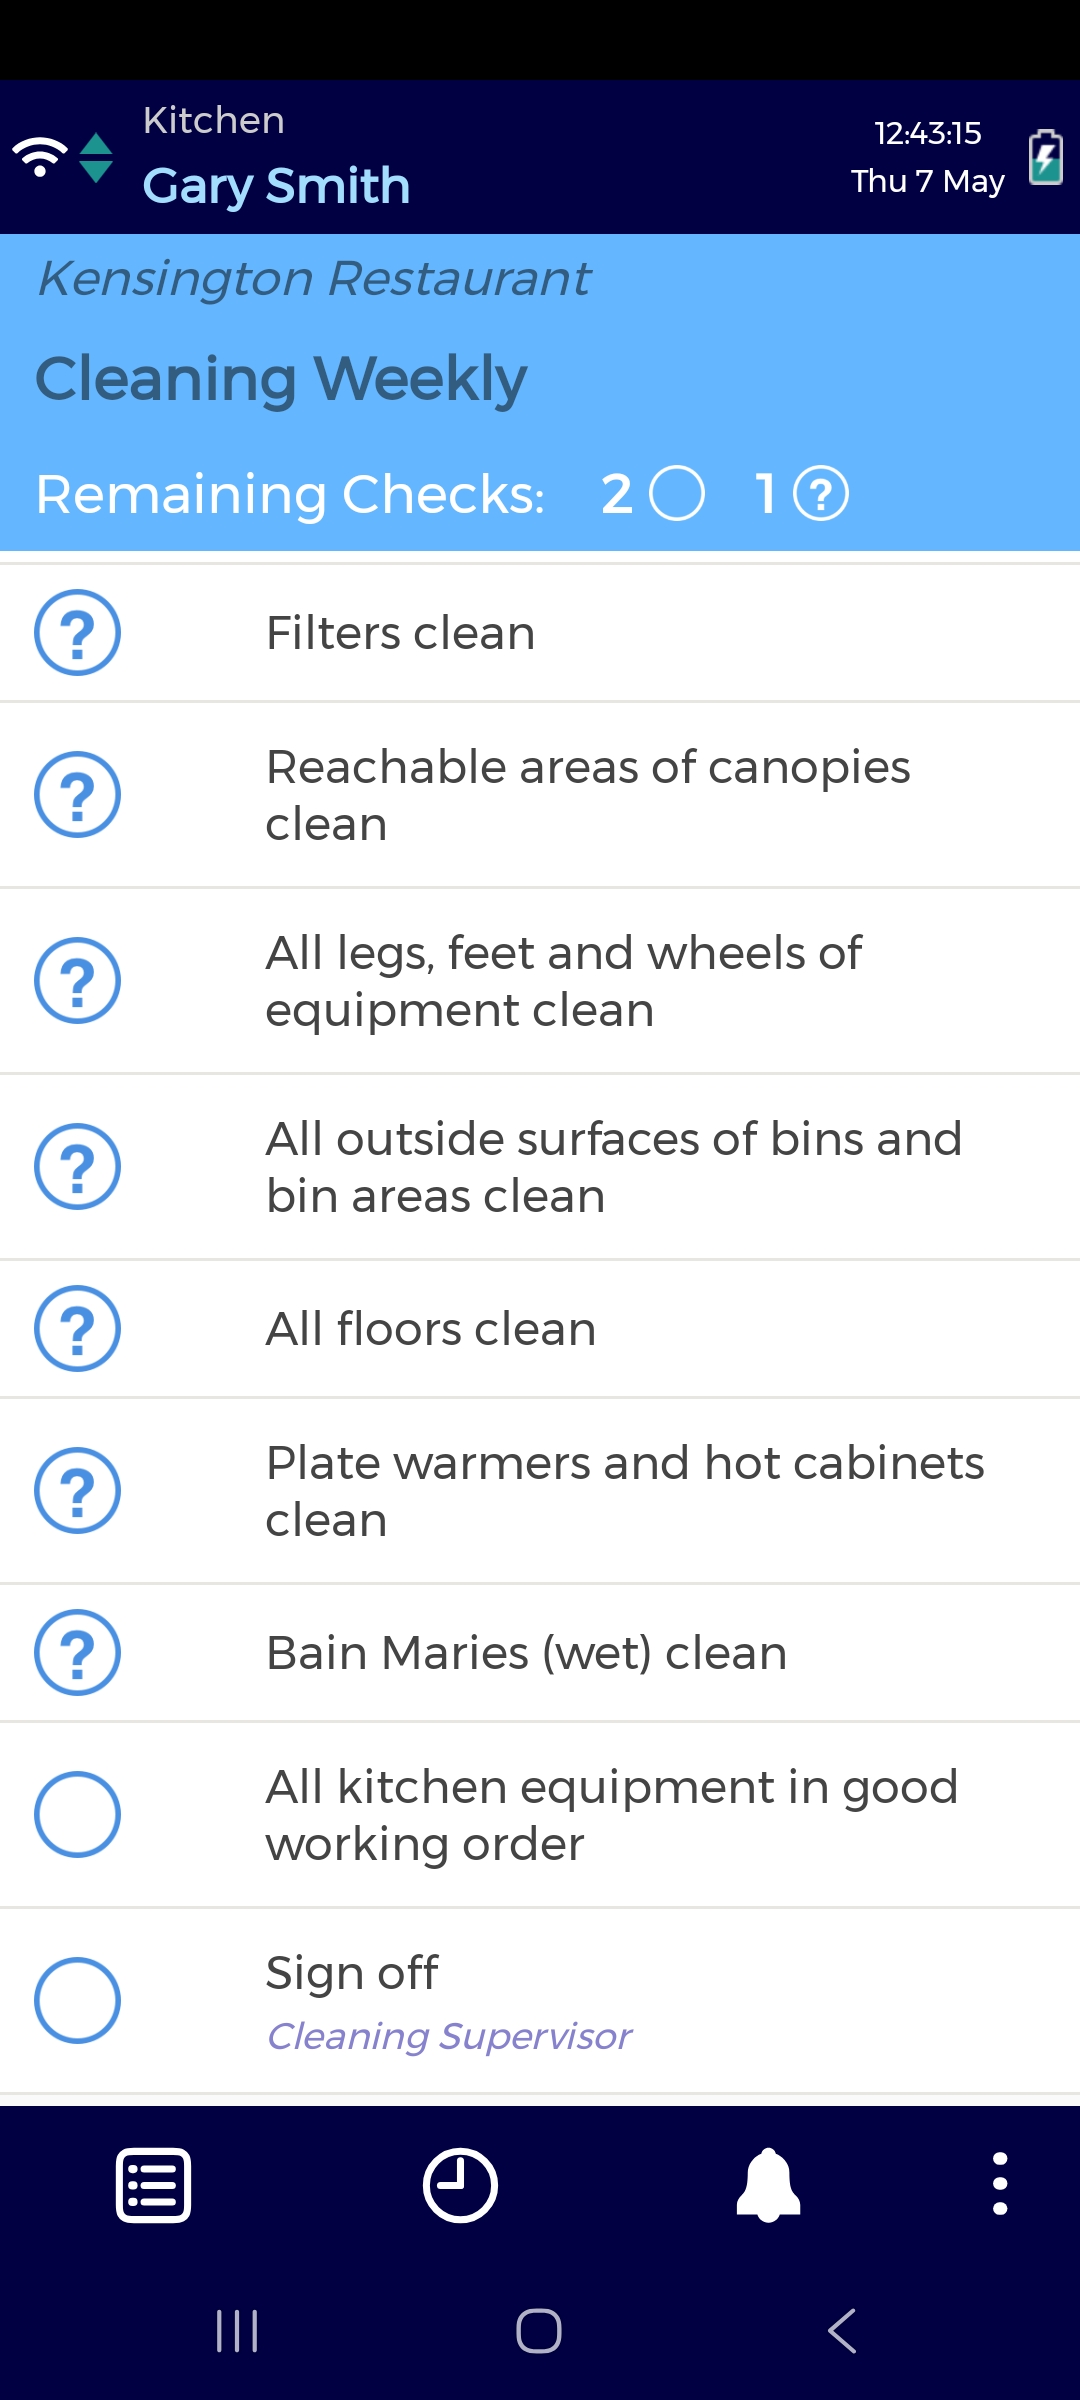
For example, if you want cleaning tasks to be reviewed by a supervisor, you could create a “Cleaning Supervisor” Custom Role, assign it to the appropriate users, then assign that role to the final sign-off check of the cleaning checklist. Only users with the “Cleaning Supervisor” Custom Role will be able to complete the check (see image 1). If not, the check will appear greyed out.
Custom Roles help support operational compliance by ensuring important checks, reviews, and sign-offs can only be completed by authorised users.
Examples of Custom Roles include:
-
Cleaning Supervisor
-
Store Manager
-
Kitchen Supervisor
-
Maintenance Supervisor
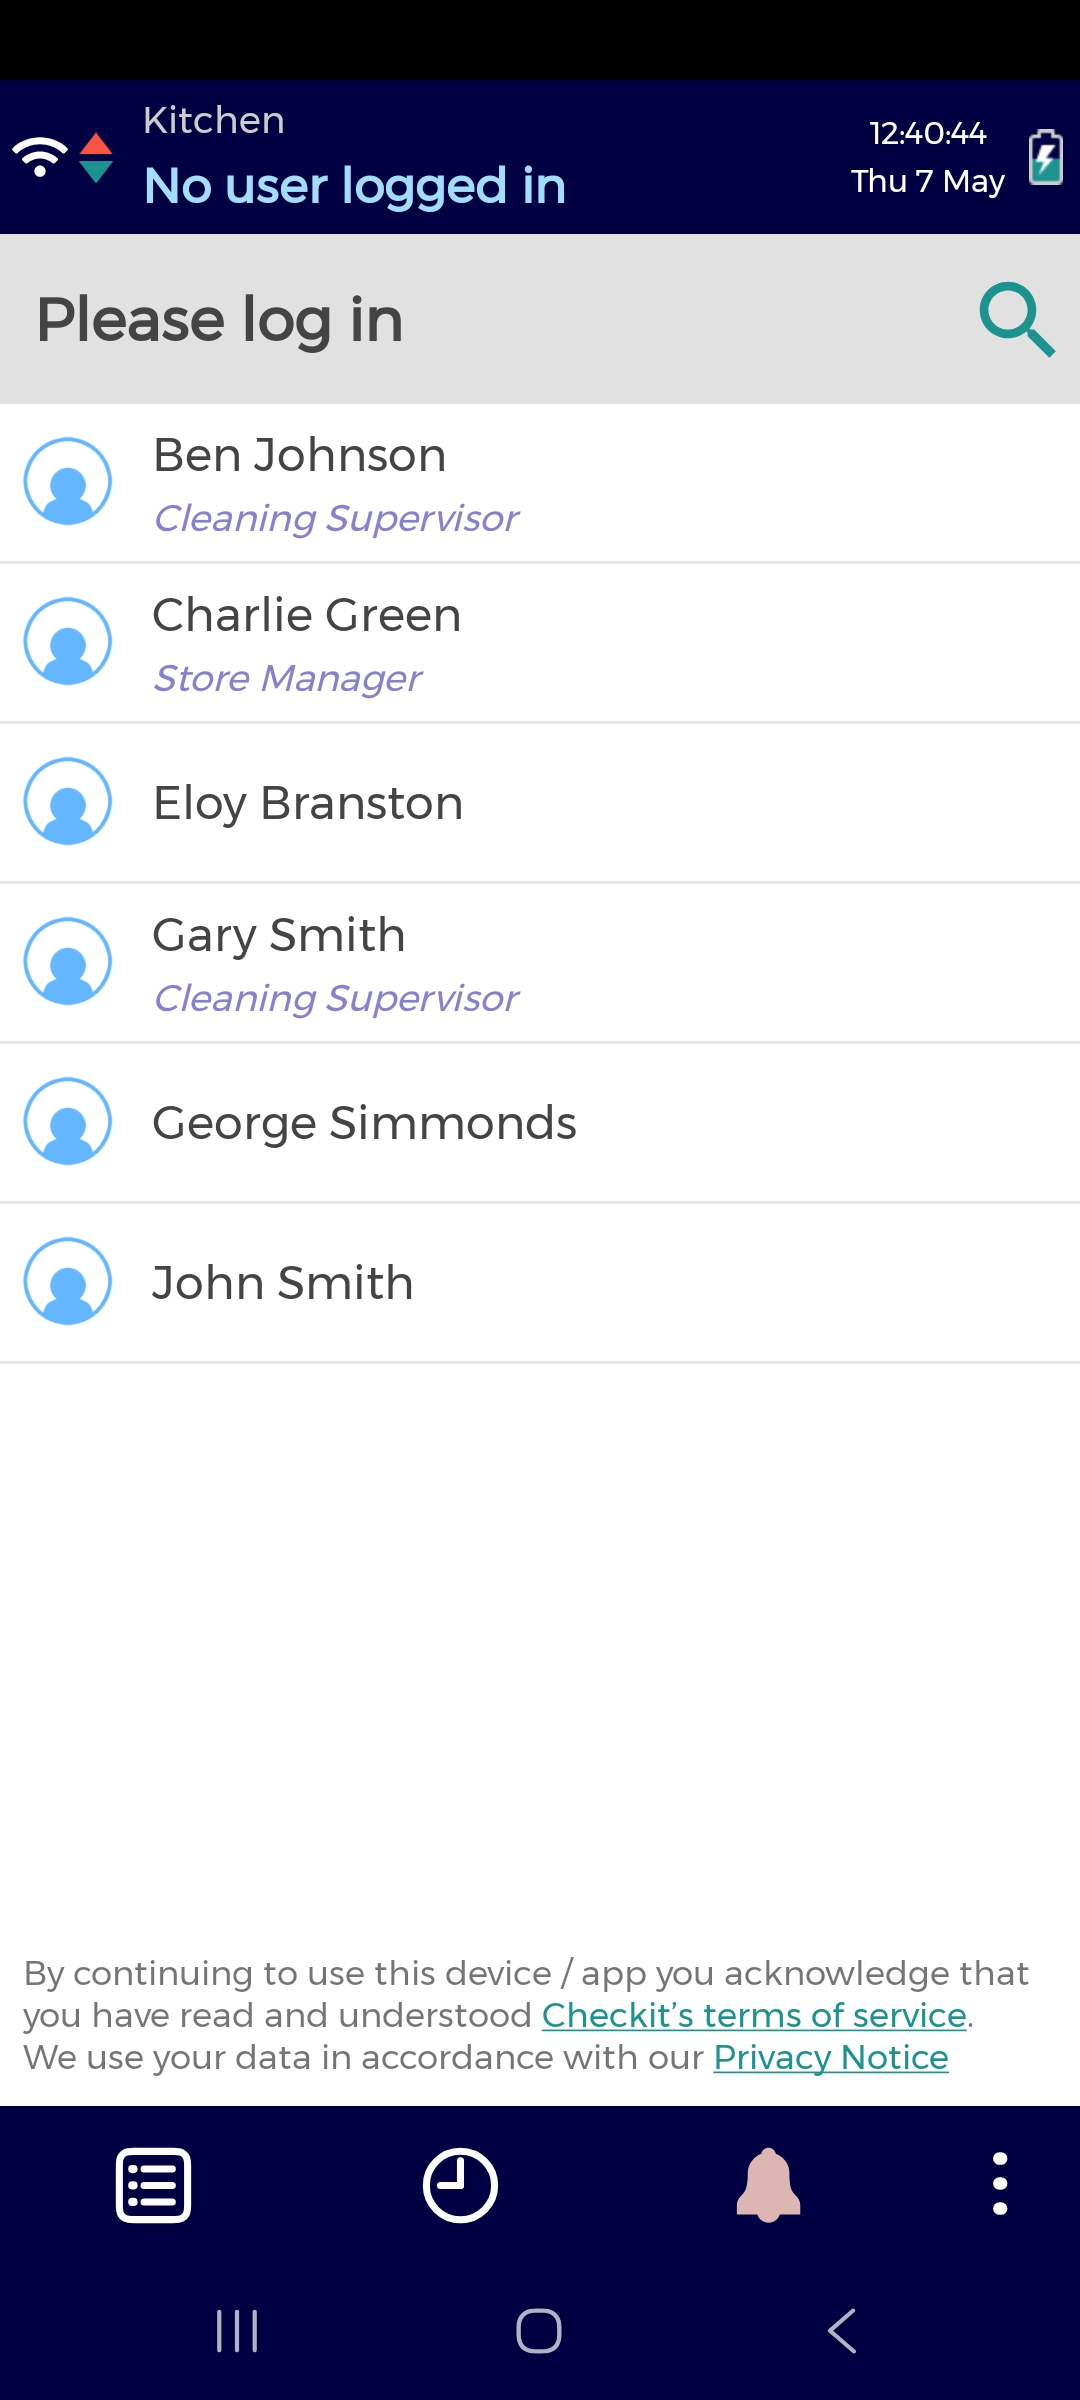
If a user is assigned a Custom Role, it will be displayed under their name on the Checkit App login screen (see image 2).
Custom Roles are currently only available on the Checkit Android App.
You must be a Safety Manager to create and assign Custom Roles.
Configuration
You must be a Safety Manager to create and assign Custom Roles.
Step 1: Create a Custom Role
-
Log in to the Control Centre.
-
Go to App Management > User Roles.
-
Click +Add User Role.
-
Enter a name, for example, “Cleaning Supervisor”.
-
(Optional) Enter a description
-
Click Save.
Step 2: Assign a Custom Role to a User
-
Log in to the Control Centre.
-
Go to Users.
-
Select the user you want to assign a custom role to.
-
Select the Roles tab.
-
In the Custom Roles field, select the required roles.
-
Click Save.
-
Multiple users can be assigned to a Custom Role.
-
A single user can be assigned multiple Custom Roles.
Step 3: Assign a Custom Role to a Check or Checklist
-
Log in to the Control Centre.
-
Go to App Management > Checklists
-
Open the required checklist or single check.
-
In Custom Roles, select the required role.
-
Click Save.