Assign a Checkpoint to an NFC Tag
This feature is currently only available on the Checkit Android App
Checkit creates a unique identifier for each Checkpoint you create, so you need to add that identifier to an NFC tag so that when the tag is read/scanned using the Checkit App the identifier is detected and Checkit knows which Checkpoint is the subject of the work. Checkit uses alphanumeric strings - '711df0a5-641f-4403-8235-602406a4488b' for example, to identify each checkpoint you define. Each string is unique. When this string is embedded into a NFC tag and that NFC tag is scanned, the identifier is recognised by Checkit and it knows which checkpoint that string has been assigned to.
So the value you enter in the Proof of Presence Identity field when creating a Checkpoint, whether your own string or one generated by Checkit (using the GENERATE IDENTITY button) is what identifies a checkpoint, but in order that is can be read by checklists users, you need to code it into an NFC tag. To do this you use the Checkit App on your mobile phone and an NFC tag and proceed as follows:
open the Checkit App and login (you must be a Checkit Administrator for this process and will be prompted for the administrative pin )
select the ellipses icon at the bottom right of the page and select Settings
select the NFC Tag Management option
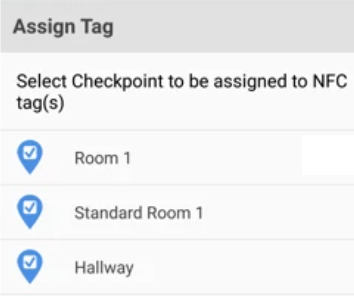
Select the Assign Tag option. Checkit will display a list of the Checkpoints already created on your Checkit Account (refer to Create Checkpoints). Select the Checkpoint you want this particular NFC tag to represent and tap the NFC Tag with your phone, as indicated by the screen graphic. On screen messages will confirm if the tag has been updated or if you need to repeat the operation /hold the phone closer to the tag.
(As you will notice the NFC Tag Management page can also be used to read an NFC tag to see which Checkpoint its already assigned to (if any) and to clear any data from an NFC tag, so you can re-use it / assign it to another Checkpoint.)

Managing NFC Tags
You affix the NFC tag to the required room/object/thing required. However, before you do so we recommend you complete the work required in Checkit to assign work to the checkpoint (refer to Assign Work to Checkpoint Types) and test that the NFC tag can be read using the Checkit App. Then move onto mounting it in place.
When working with NFC Tags it is sometimes possible to lose track of which Checkpoint a NFC tag belongs to. So when you code the NFC tag it can be useful to mark the tag with a name and keep a file/spreadsheet recording the Checkit Identifier code associated with each named tag which also includes the location of the tag. When a tag fails or reaches end of life for example, you can ensure continuity by assigning the same identifier to the replacement tag.
To find out which Checkpoint an NFC tag is already assigned to (if any):
open the Checkit App and login (you must be a Checkit Administrator for this process)
select the ellipses icon at the bottom right of the page and select Settings
select the option NFC Tag Management .
Select the Display Tag option then tap the tag with the phone. Checkit will display the Checkpoints already assigned.
(As you will notice the NFC Tag Management page can also be used to read an NFC tag to see which Checkpoint its already assigned to (if any) and to clear any data from an NFC tag, so you can use it for another Checkpoint.)
To delete / remove a Checkpoint from an NFC tag:
open the Checkit App and login (you must be a Checkit Administrator for this process)
select the ellipses icon at the bottom right of the page and select Settings
select the option NFC Tag Management .
Select the Clear Tag option and then tap the tag with the phone. Checkit will remove the Checkpoint identity data from the NFC tag and confirm.