Follow the instructions below if you need to replace a Sensor+ head.
You must replace the head with a like-for-like replacement.
Sensor+ contact heads do not require calibration certificates.
-
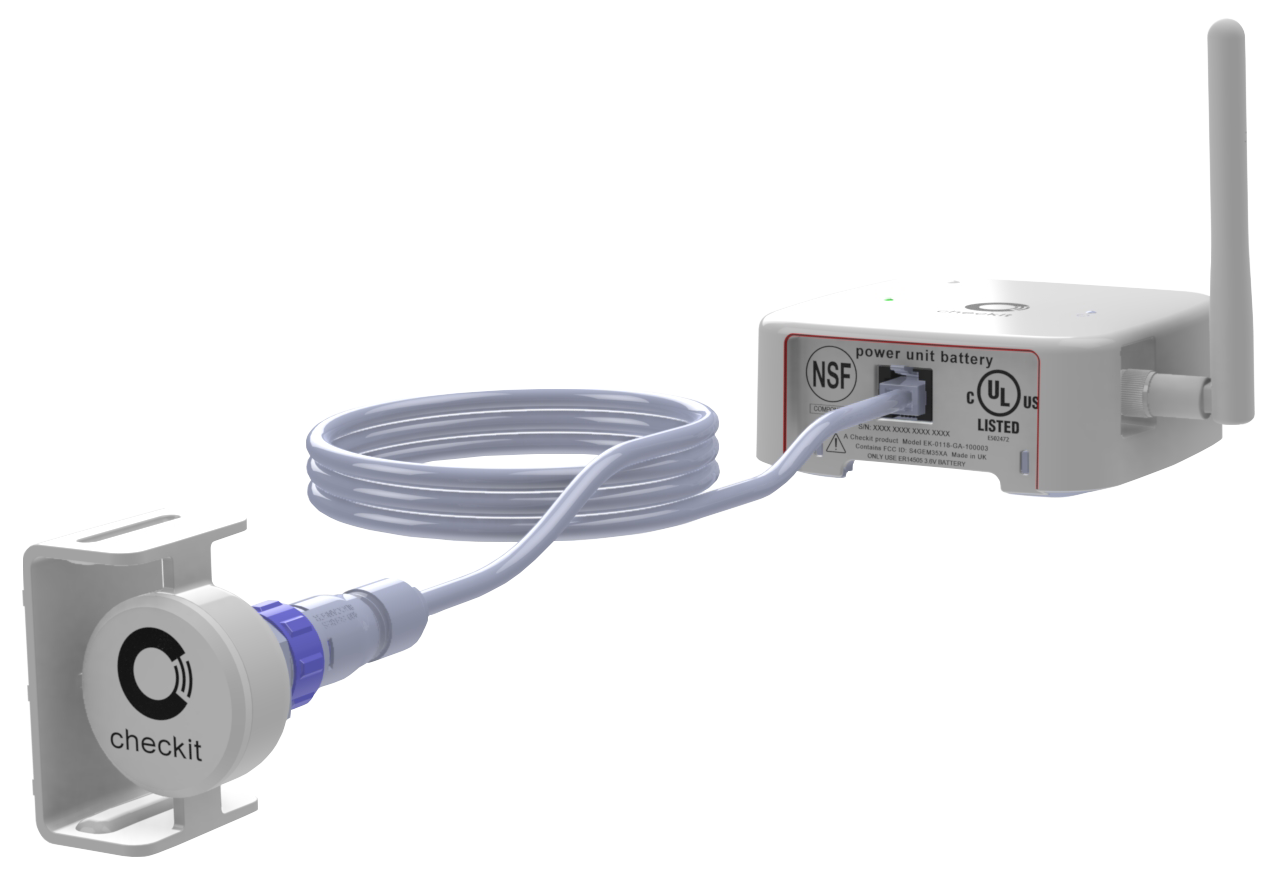
Unclip the old head from the Power Unit Battery (PUB).
The Power Unit Battery (PUB) is a white plastic box connected to the sensor head by a cable (see image 1).
-
Clip the new head onto the PUB.
-
Place the Magnetic Tag on the bottom-left corner of the sensor and hold it there for about 3 seconds. During this time, the Mode LED (right) should flash green, then amber. Remove the Magnetic Tag after this sequence completes.
The Magnetic Tag is a small white magnet (see image 2).
Caution: The Magnetic Tag may interfere with pacemakers and implantable cardioverter-defibrillators (ICDs). Keep the tag at a safe distance from such devices
-
Place the Magnetic Tag on the bottom-left corner of the sensor and hold it there for exactly 52 seconds.
-
After removing the Magnetic Tag, you should see the following LED pattern:
-
The Mode LED (right) will flash green.
-
The Mode LED (right) & Health LED (left) will flash green, then amber & then red.
-
The Health LED (left) will flash green.
-
If you do not see the LED pattern described above, repeat step 4. Ensure that you press the Magnetic Tag for exactly 52 seconds.
-
Wait for 1 hour.
-
View the sensor in the Control Centre. If it is:
-
Green: You have successfully replaced the sensor head.
-
Amber: You have successfully replaced the sensor head.
-
Red: You have successfully replaced the sensor head.
-
Black: Contact us for assistance.
-
.png?cb=a11c3a84dc722e702e876c3e6d3ae09f)