You will need to create a checklist if you implement a new on-site procedure.
Only Safety Managers can create checklists. See User Roles for more details.
Checkit provides a selection of predefined checks and checklists designed for a number of routine tasks.
Step 1: Name the Checklist
-
Log in to the Control Centre.
-
Go to Configuration>Work Management>View/Edit.
-
Select the What tab.
-
Click Add New.
-
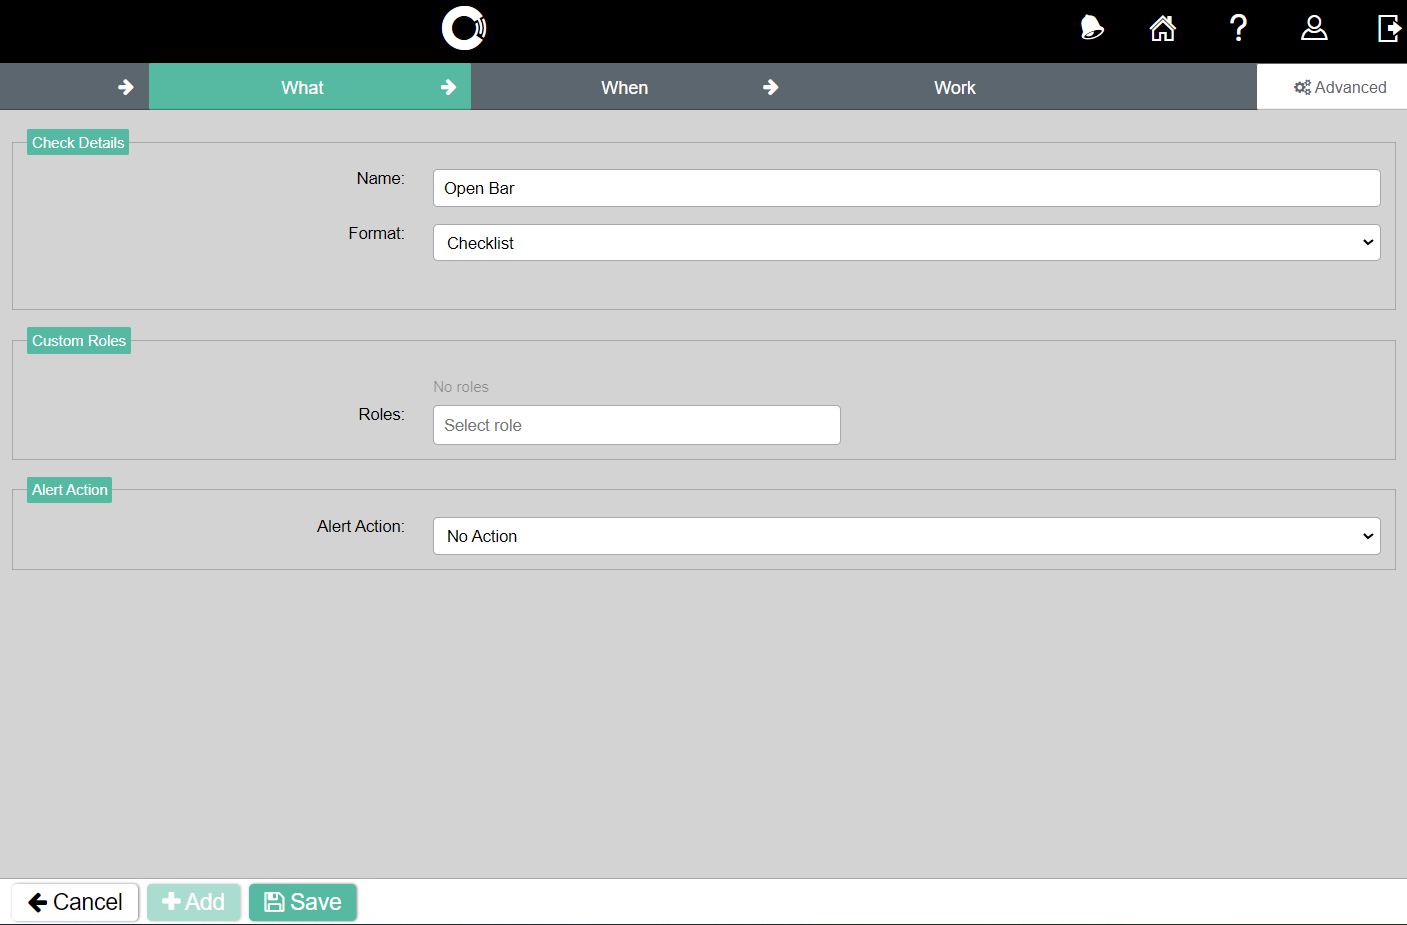
Type a name for your checklist in the Name field, for example, ‘Open bar’.
-
Click the Format field, then select Checklist from the drop-down menu.
-
Click Save.
Step 2: Add Some Checks
-
Click the Add button at the bottom of the screen.
-
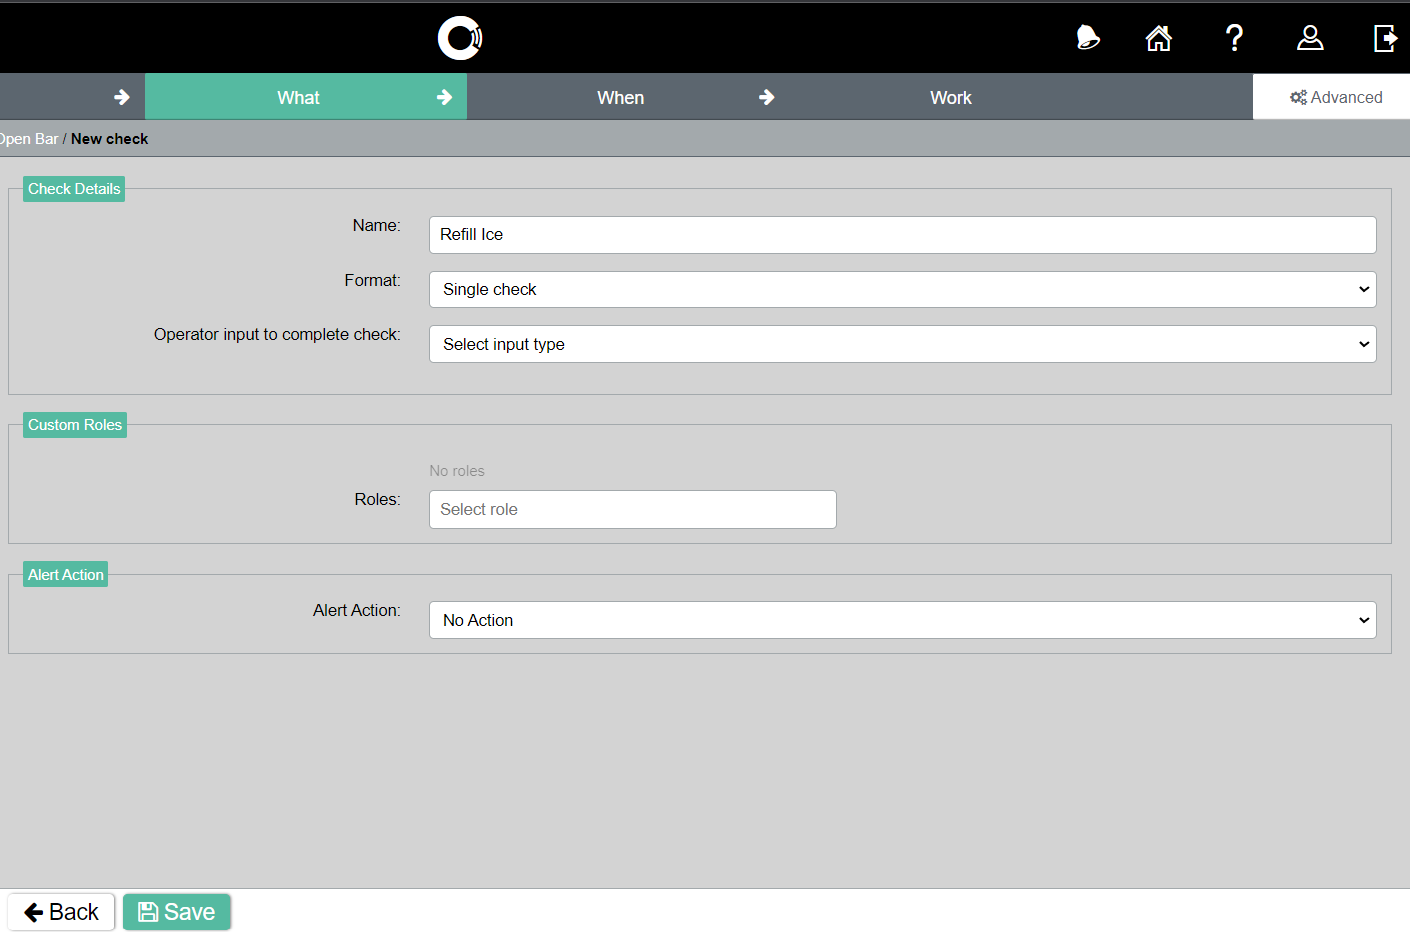
Type a name for your check in the Name field, for example, ‘Refill ice’.
-
Click the Format field and select Single check from the drop-down menu. Alternatively, if you want to add a checklist within a checklist, select Checklist.
-
Click the Operator input to complete check field and select an option from the drop-down menu. There are five types of checks. See below for full instructions on how to configure each type of check:
How to Configure Different Types of Checks
Measure Temperature
-
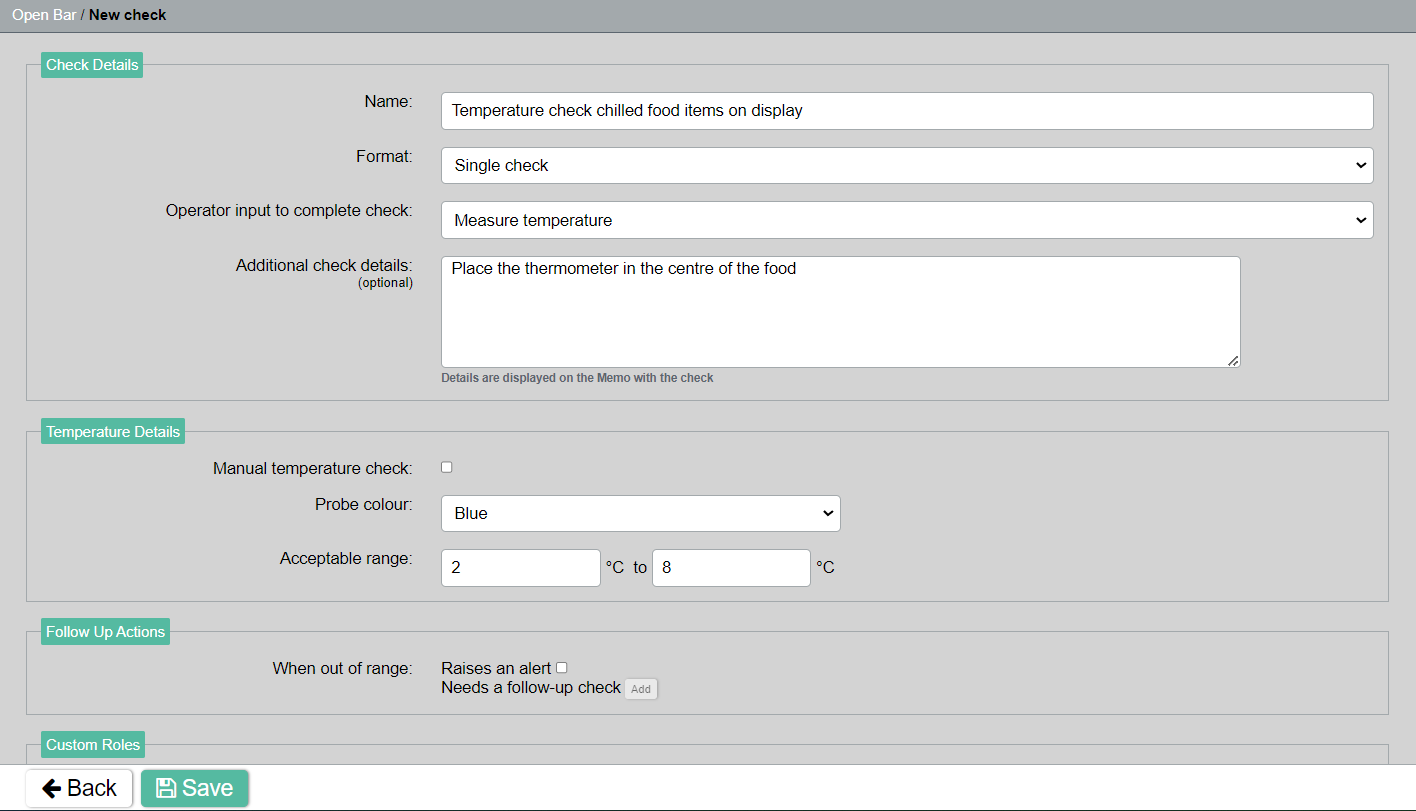
(Optional) Type some instructions for staff in the Additional check details field, for example, “Place the thermometer in the centre of the food”
-
If you:
-
Do not use Checkit/ETI Probes, tick the Manual temperature check box
-
Do use Checkit/ETI Probes, click the Select colour dropdown and select an option (red, blue, any colour)
-
If the check will be completed using an ETI Infared Probe, you must select any colour.
-
Enter an acceptable temperature range, for example, 75°C - 90°C.
-
(Optional) If you want a check alert to be generated if the temperature is out of range, click the Raises an alert box.
-
(Optional) If you want a follow-up check to be triggered if the temperature is out of range:
-
Click Save.
-
Click Add next to Needs a follow-up check.
-
Configure the check.
-
Click Save.
-
Click Back.
-
-
Click Save.
-
To add another check, you can either:
-
Click Back , then repeat the process.
-
Click Duplicate , then edit the duplicated check accordingly.
-
Click here to watch a video on measure temperature checks.
List of Options
-
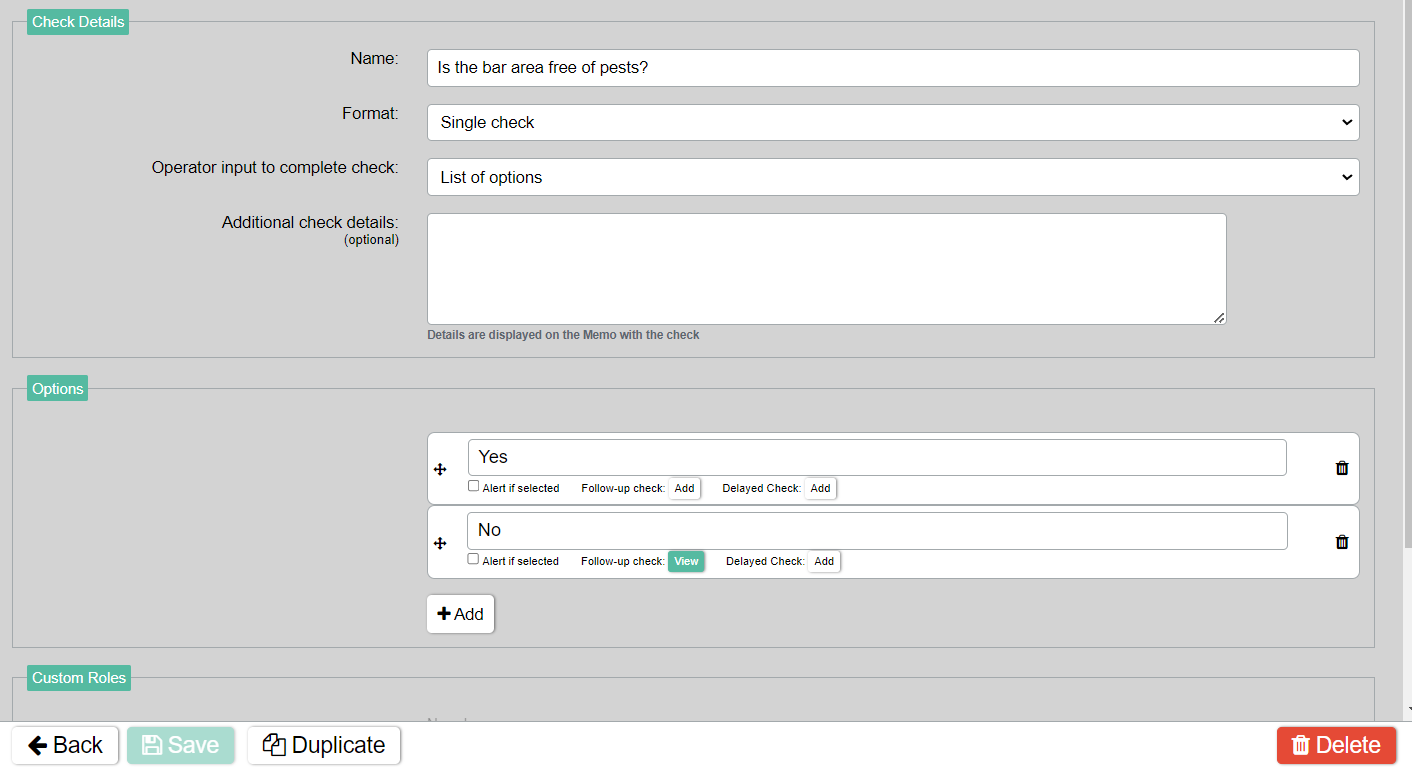
(Optional) Type some instructions for staff in the Additional check details field, for example, ‘Select an option’.
-
Type a response in the Options field, for example, Yes, No, etc.
-
Click the +Add button to add more options.
-
(Optional) If you want a check alert to be generated if staff select a certain option, click the Alert if selected box.
-
(Optional) If you want a follow-up check to be triggered if staff select a certain option:
-
Click Save.
-
Click Add next to follow-up check.
-
Configure the check.
-
Click Save.
-
Click Back.
-
-
Click Save.
-
To add another check, you can either:
-
Click Back , then repeat the process.
-
Click Duplicate , then edit the duplicated check accordingly.
-
Free Text/ Numeric Input
-
Select an option from the Validation type drop-down menu:
-
Text Validation
-
Numeric Validation
-
Sequenced Numeric Validation
-
-
(If applicable) If you selected Sequenced Numeric Validation:
-
Enter the minimum number staff can input.
-
Enter the step (multiples of which staff can input).
-
Enter the maximum number staff can input.
-
-
(Optional) Type some instructions for your staff in the Input prompt field, for example, ‘Let us know if there are any issues'.
-
(Optional) If you want this check to generate a check alert, click the Raises an alert box.
-
(Optional) If you want this check to trigger a follow-up check:
-
Click Save.
-
Click Add next to Needs a follow-up check.
-
Configure the check.
-
Click Save.
-
Click Back.
-
-
Click Save..
-
To add another check, you can either:
-
Click Back , then repeat the process.
-
Click Duplicate , then edit the duplicated check accordingly.
-
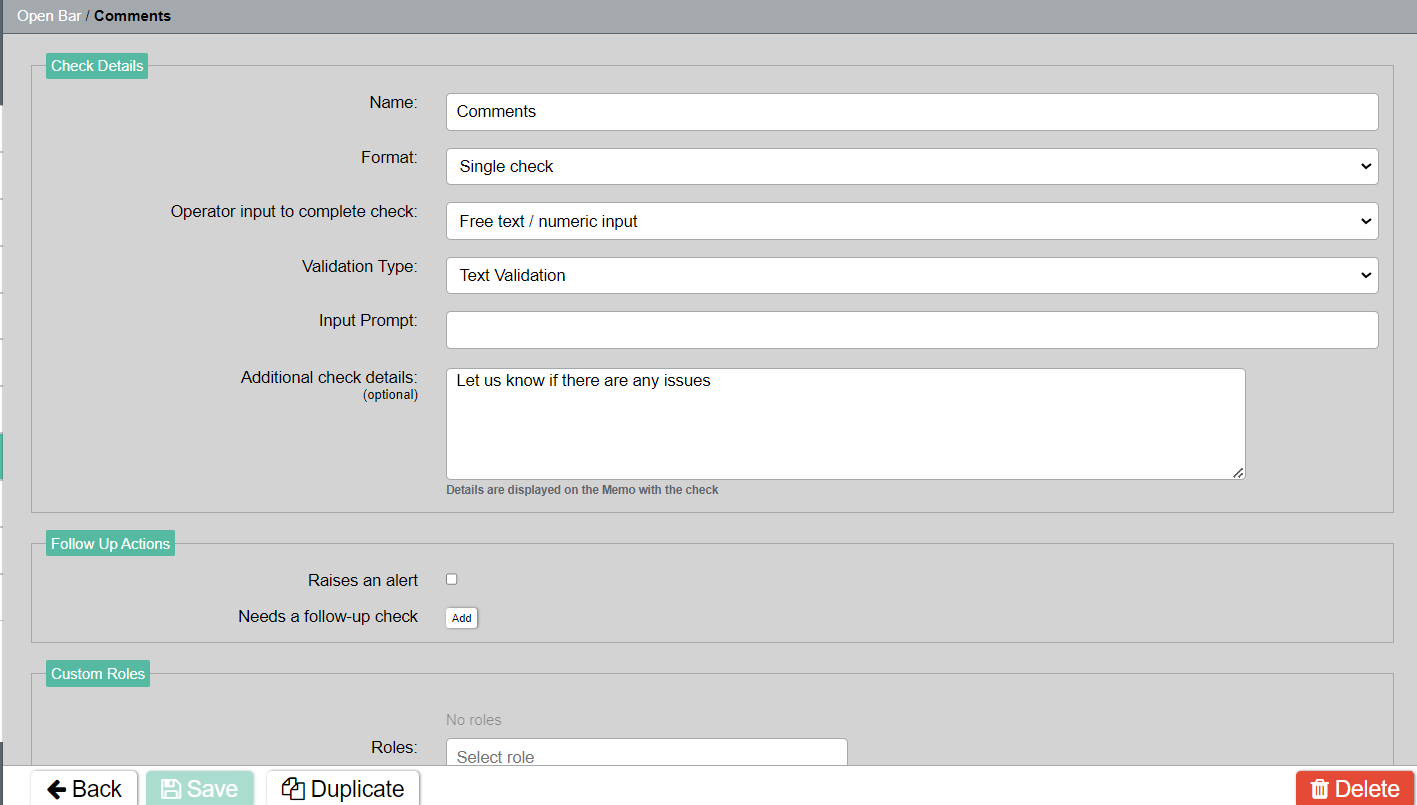
Confirm Instruction
-
(Optional) Type some instructions for staff in the Additional check details field.
-
(Optional) If you want this check to generate a check alert, click the Raises an alert box.
-
(Optional) If you want this check to trigger a follow-up check:
-
Click Save.
-
Click Add next to Needs a follow-up check.
-
Configure the check.
-
Click Save.
-
Click Back.
-
-
Click Save.
-
To add another check, you can either:
-
Click Back , then repeat the process.
-
Click Duplicate , then edit the duplicated check accordingly.
-
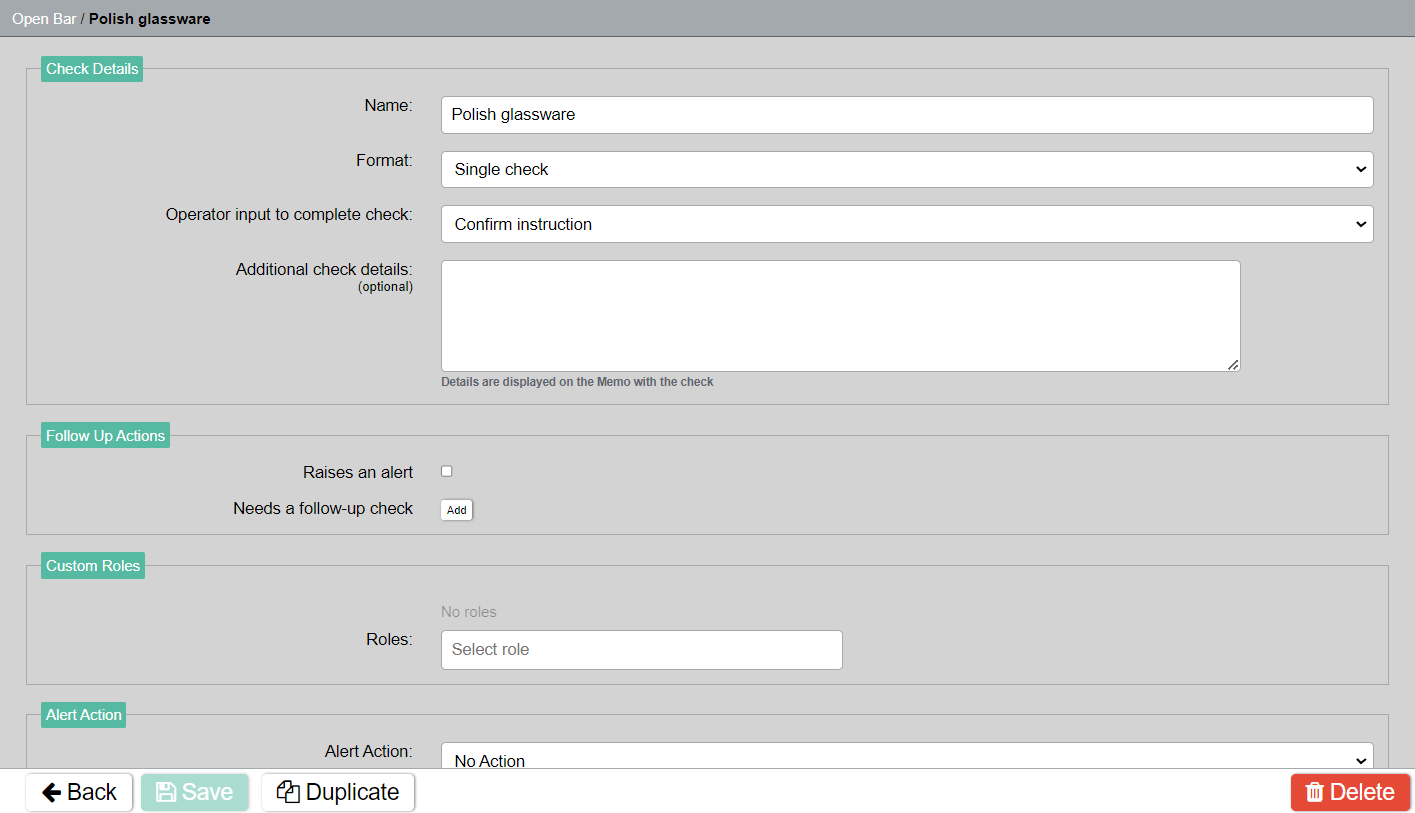
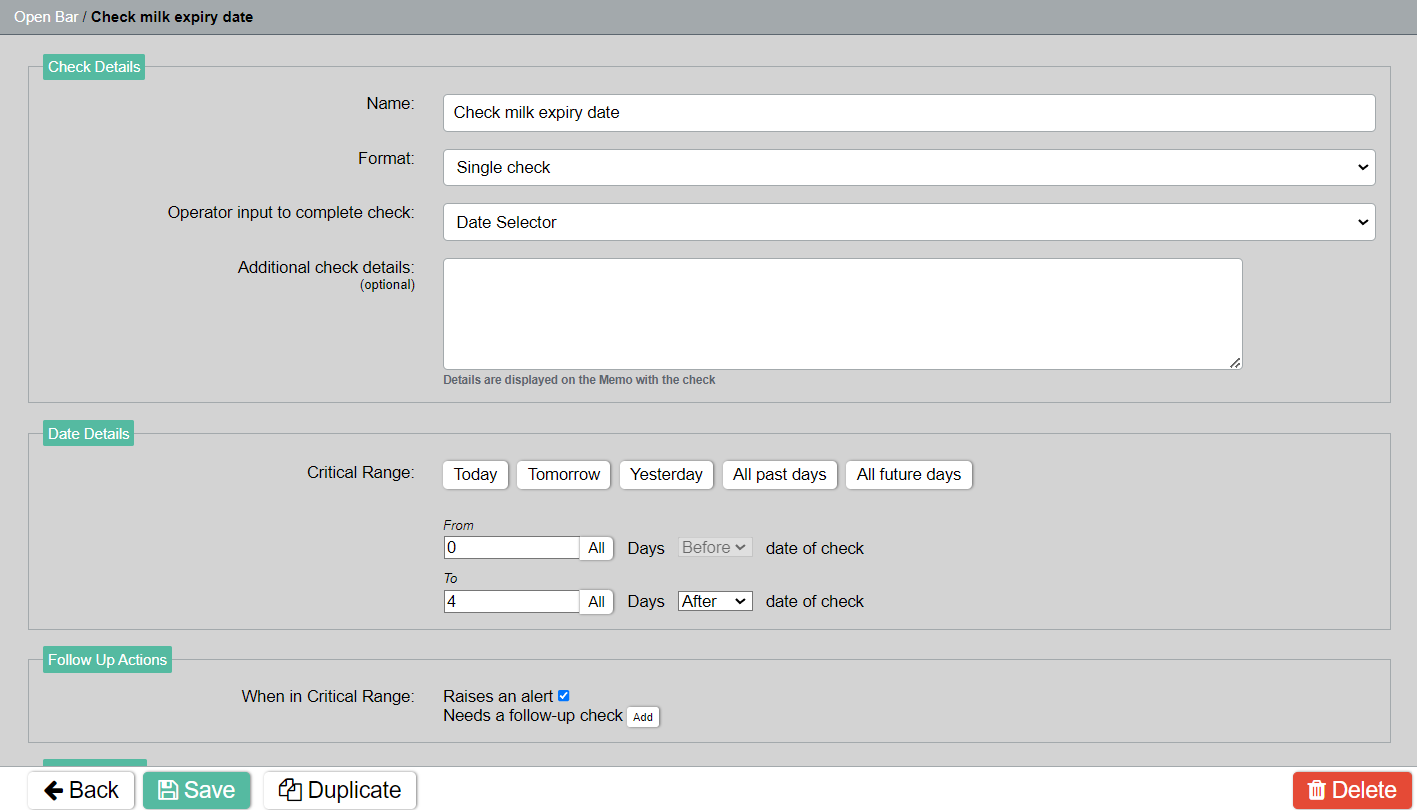
Date Selector
-
(Optional) Type some instructions for staff in the Additional check details field.
-
(Optional) If you want to specify a critical range:
-
Select an option in the Critical range field: today, tomorrow, yesterday, all past days, all future days.
-
Specify a time, for example, from 0 days before date of check to 5 days after date of check.
-
-
(Optional) If you want a check alert to be generated if staff select a date within the critical range, click the Raises an alert box.
-
(Optional) If you want a follow-up check to be triggered if staff select a date within the critical range:
-
Click Save.
-
Click Add next to Needs a follow-up check.
-
Configure the check.
-
Click Save.
-
Click Back.
-
-
Click Save.
-
To add another check, you can either:
-
Click Back , then repeat the process.
-
Click Duplicate , then edit the duplicated check accordingly.
-
Step 3: Review & Add Some Finishing Touches
When you have finished adding your checks, you can review your checklist, edit it, and add some finishing touches. To do so, make sure you are on the main page of the checklist. You should be able to see the name of your checklist in the Check details section at the top of the screen. If not, press the back button at the bottom of the screen.
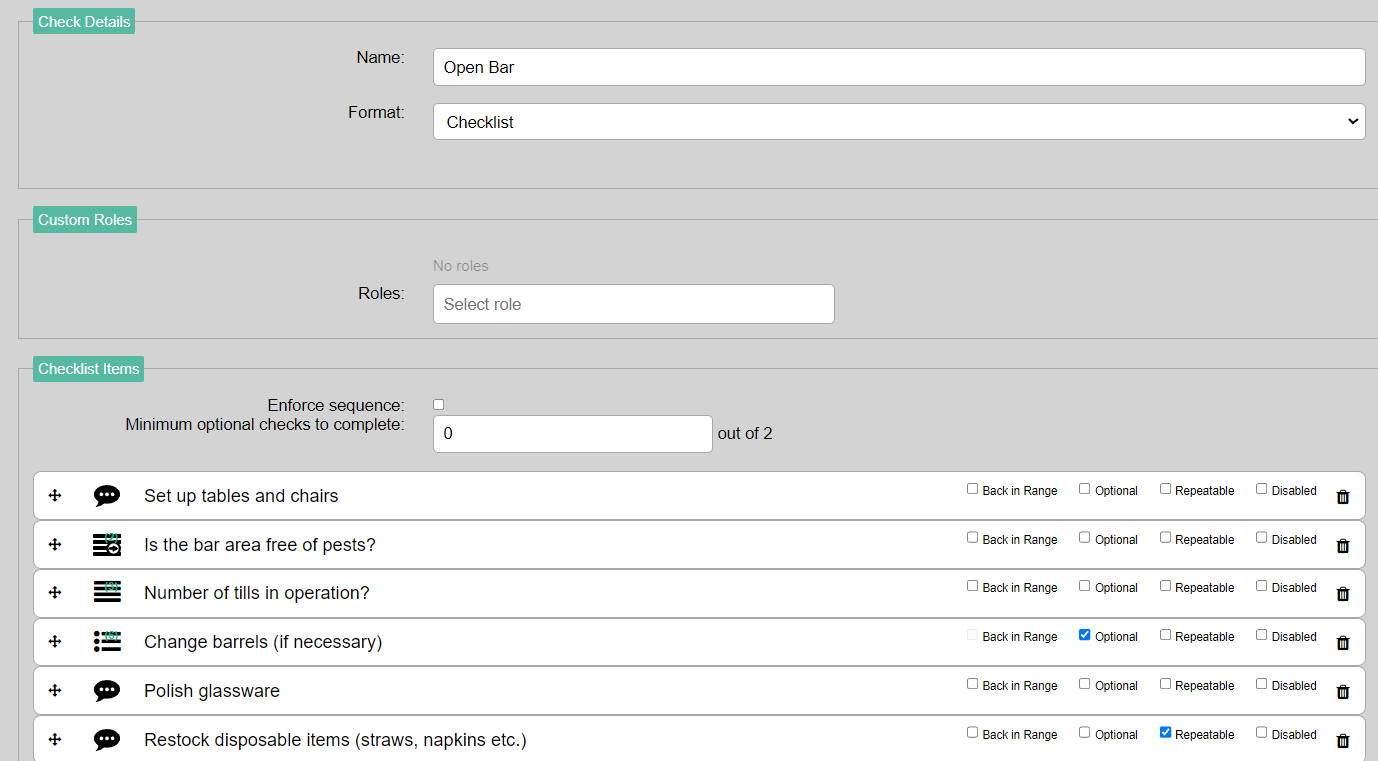
Make Checks Optional and/or Repeatable (optional)
-
Scroll down to the Checklist items section.
-
Find the check you want to make optional and/or repeatable.
-
Click the Optional and/or Repeatable box.
-
Click Save at the bottom of the screen.
Reorder Checks (optional)
Unless you enforce the sequence of a checklist, staff will still be able to complete the checks in any order, regardless of how you organise the checks.
-
Scroll down to the Checklist items section.
-
Hover your cursor over the icon (see image below) on the check you want to move.

-
Hold down the mouse button.
-
Drag the check up or down.
-
Click Save at the bottom of the screen.
Enforce the Sequence of Checks (optional)
This feature is currently only available on the Checkit Android App
If you enforce the sequence of a checklist, staff must complete the checks in order, but they can still skip optional checks and go back and complete the repeatable checks again.
-
Scroll down to the Checklist items section.
-
Click the Enforce sequence box.
-
Click Save at the bottom of the screen.
