Overview
Delayed checks ensure that time-sensitive follow-up tasks are completed at the right time, such as discarding unsold food items a certain number of hours after they have been put in hot hold.
When an initial check is completed, a delayed check is automatically generated, which prompts you to take follow-up action at the appropriate time (see video 1).
This is an optional feature. Please contact us to enable it.
Delayed checks are available on the Checkit Android App and the Checkit iOS App 2.1.0 and above.
Click here to view how to complete, view, edit, and cancel delayed checks on the Checkit App.
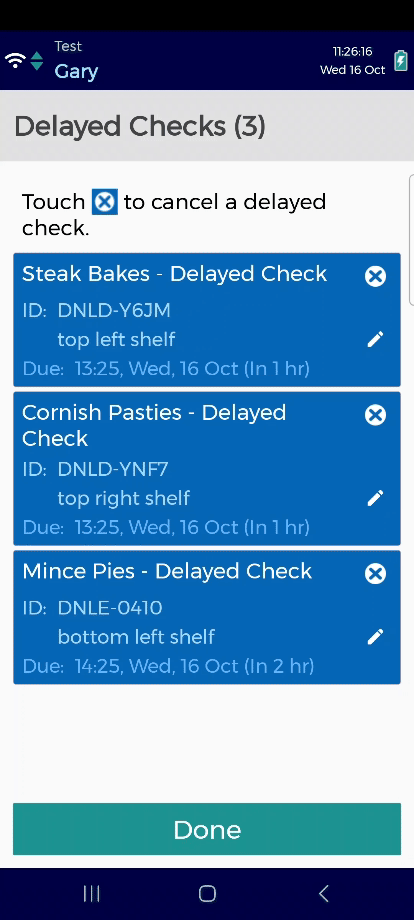
All delayed checks (including completed and cancelled delayed checks) are displayed in the Work Report.
Configuration
You must be a Safety Manager to add a delayed check.
You can only add delayed checks to an options list check.
You can create any type of delayed check. For example, you may create a confirm instruction check, a list of options check, a temperature check, a free text input check, etc.
You can create a delayed checklist if the option in the initial check requires multiple follow-up tasks.
-
Click Add Delayed Check on an option.
-
Enter a name for the delayed check.
We recommend you name the delayed check the name of the option + “- Delayed Check”, for example, “Steak Bakes - Delayed Check, Mince Pies - Delayed Check”
-
In the Type field, select the check you want to create:
-
Checklist
-
Temperature Check
-
Acknolwedgement
-
Text/Numeric Input
-
Date Entry
-
Options List
-
See Types of Checks for a full description of each check and its use case
-
(Optional) Enter some instructions in the Description field, for example, ‘End hot holding’.
-
Configure the check as appropriate (see How to Configure Each Type of Check for full instructions).
-
Enter a delay duration in minutes, hours, or days (the delay between the initial check & delayed check).
-
Enter how long staff have to complete the delayed check, in minutes, hours, or days.
An overdue alert will be triggered if the delayed check is not completed within this time.
-
Enter how much extra time staff have to complete the delayed check if it is overdue.
-
(Optional) Check the Raise alert on manual cancellation box if you want to receive an alarm if the delayed check is cancelled.
If you check this box, a check alert will be generated every time the delayed check is cancelled.
-
Click Save.
-
Repeat steps 1-10 until all applicable options in the initial check have a delayed check.
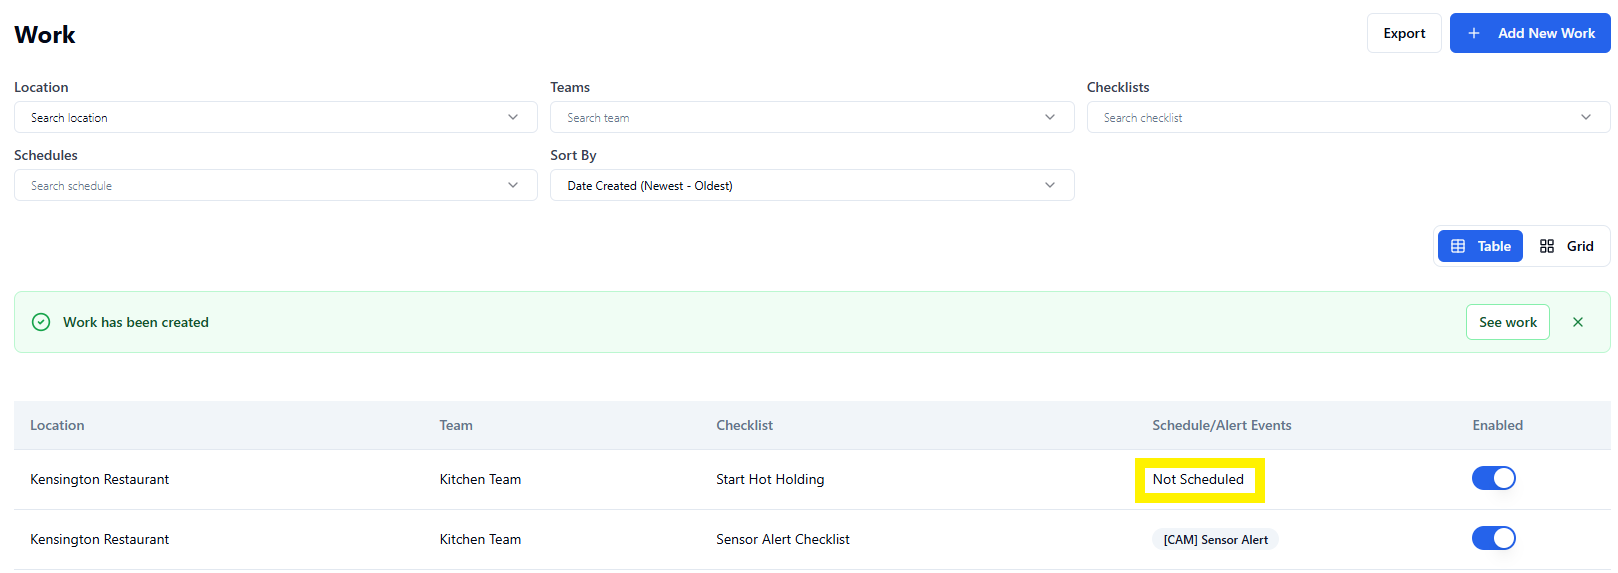
It may be necessary to complete the initial check multiple times. For example, you will need to complete a ‘Start Hot Holding’ check every time you put a product in hot hold. To achieve this, if the initial check is:
-
A single check, you should assign it as unscheduled work - see Create Work for instructions (see image 2)
-
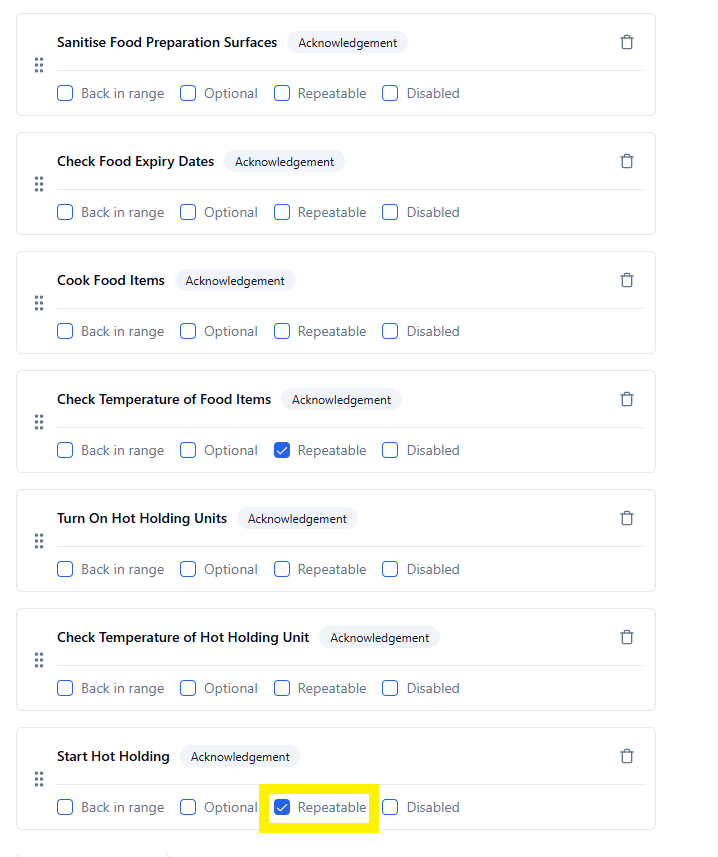
Part of a checklist, you should make the check repeatable (see image 3)
Advanced Configuration
Preconfigure Reasons for Cancellation (Optional)
Preconfiguring a cancellation reason is only available on the Checkit Android App (including Ulefone devices).
By default, if staff want to cancel a pending delayed check, they must type a reason. However, you can preconfigure a list of reasons so they can select an option instead (see image 4).
To do so:
-
Click View to open the delayed check.
-
In the Additional information field, enter options in the following format:
[cancellation reason: "option", "option", "option", "option"]
-
Click Save.
-
Repeat steps 1-3 with all applicable delayed checks.
Record How Many Items Are Discarded (Optional)
If you use delayed checks to manage hot holding, you can add a follow-up check to the delayed check to record how many items are discarded (see image 5). To do so:
-
Click Add next to Follow up check.
-
Enter a name, for example, ‘Enter Number of Items Discarded’.
-
Select Single Check.
-
Select Free text/numeric input.
-
Select Numeric input.
-
(Optional) Add some instructions in the Description field.
-
Click Save.
-
Repeat steps 1-7 with all applicable delayed checks.
Add a Delayed Temperature Check for Out-of-Range Readings (Optional)
You can configure a delayed temperature check, which is generated if the reading in an initial temperature check is out of range (see image 6). To do so:
Step 1: Add a Follow-Up Check to the Initial Temperature Check
-
Click Add next to Needs a follow-up check.
-
Enter a name, for example, ‘Check Again’.
-
Select Single check.
-
Select List of Options.
-
Create an option, for example, ‘Repeat Temperature Check’.
-
Click Save.
Step 2: Add a Delayed Check to the Follow-Up Check
-
Click Add next to Delayed Check.
-
Select Single check.
-
Select Measure Temperature.
-
Enter a delay duration in minutes, hours, or days (the delay between the initial check & delayed check).
-
Enter how long staff have to complete the delayed check, in minutes, hours, or days.
An overdue alert will be triggered if the delayed check is not completed within this time.
-
Enter how much extra time staff have to complete the delayed check if it is overdue.
-
(Optional) Check the Raise alert on manual cancellation box if you want to receive an alarm if the delayed check is cancelled.
If you check this box, a check alert will be generated every time the delayed check is cancelled.
-
Configure the temperature check (see Temperature Check for full instructions).
-
Click Save.
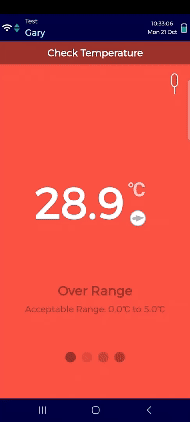
A delayed check will only be generated if the initial reading is out of range.
We provide sensors which automatically record the temperature of hot hold units and refrigerators at 5-minute intervals. Please contact our sales team for more information.