Please follow the instructions below if you receive a probe failure alarm.
-
Check the channel number in the alarm notification; it will end with the letter A or B (see image 1). A indicates that the problem is with the probe in the left socket (see image 2). B indicates that the problem is with the probe in the right socket.
-
Locate the transmitter on site.
-
Ensure that the probe cable is securely connected to the appropriate socket.
-
If the probe
-
Was not securely connected, wait 5 minutes, then check if the sensor readings on the CAM+ Website have returned to normal (indicating that you have resolved the issue)
-
Was securely connected, continue with step 5.
-
-
Ensure that the probe wire has not been damaged (even a slight fray can cause the circuit to short). If:
-
The cable has been damaged, please contact us.
-
The cable has not been damaged, continue to step 6
-
-
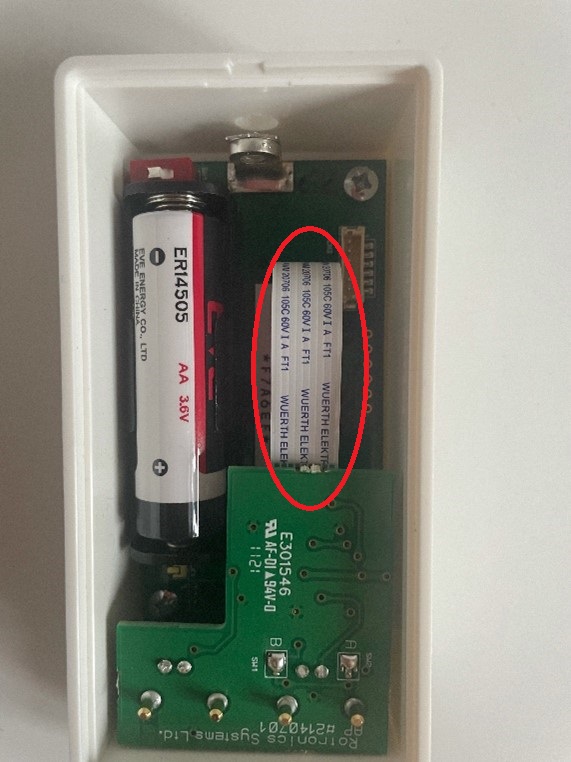
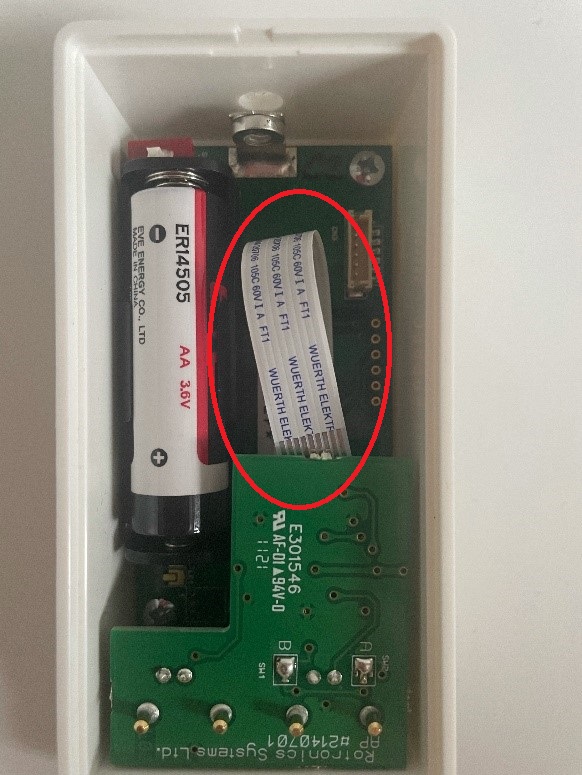
Open the back panel of the transmitter to check that the ribbon cable is fully attached to the circuit board (see image 3). If the ribbon cable is not fully attached (see image 4), please connect it.
-
Wait 5 minutes, then check if the sensor readings on the CAM+ Website have returned to normal (indicating that you have resolved the issue). If not, please contact us.
-
Complete an incident audit.